
Pro Flash Instructions
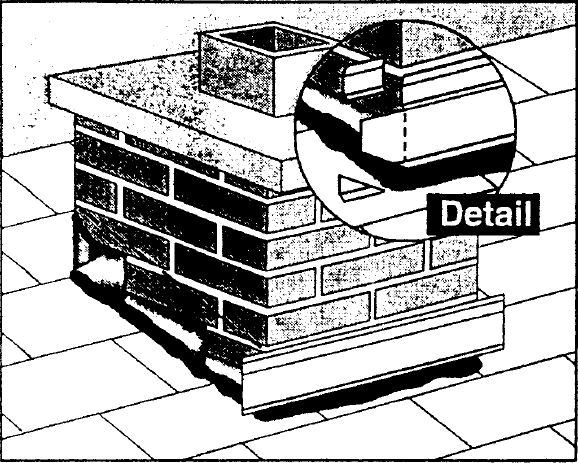
Step 1:
Align flashings around chimney base prior to installing and mark along tops (see dashed line). This will help you in piece by piece installation alignment. Next, extend bottom flashing past chimney sides 2 to 3 inches. Notch top and bottom areas and bend extended portions around to sides of chimney (see dashed line in detail). Fasten flashing in place using masonry anchors.
 Step 2:
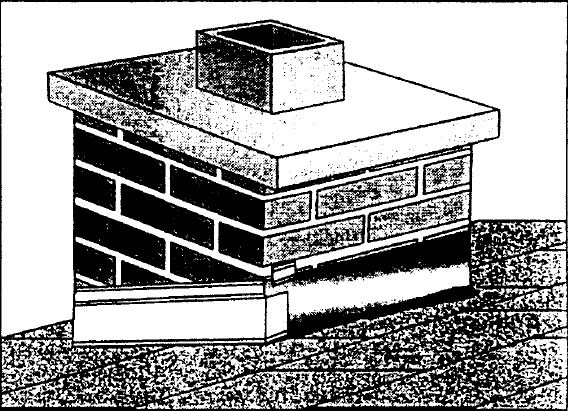
On each side flashing, extend past chimney 2 to 3 inches. At the lower area, trim flashing flush with chimney. At the top area where the flashing extends past the chimney back, notch flashing at corner and bend remainder around to the back of the chimney (as shown at right). Fasten flashing along your pre-installation marks.
 Step 3:
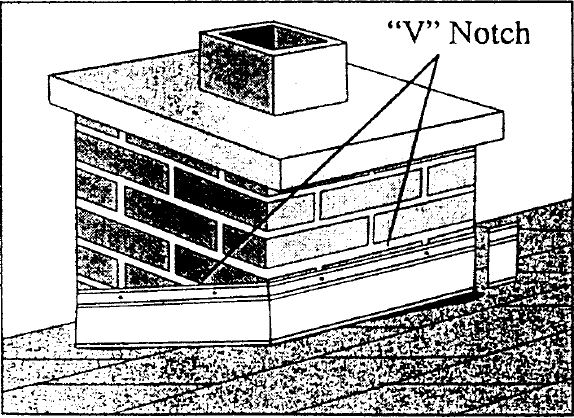
Trim final flashing even with the chimney corners. Fasten flashing to chimney along your pre-installation marks. Place suitable caulking into top “V” notch and at corners.